Recently I decided to add a new functionality to my METAR map to support a small display that shows the METAR information for the various airports on the chat.
I decided I wanted to keep it compact, so I bought this small 128 x 64 pixel display from Amazon to embed into my METAR Map. It’s about 2.5 x 1.5 mm (1 x 0.5 in) in size, so it takes up very little space.
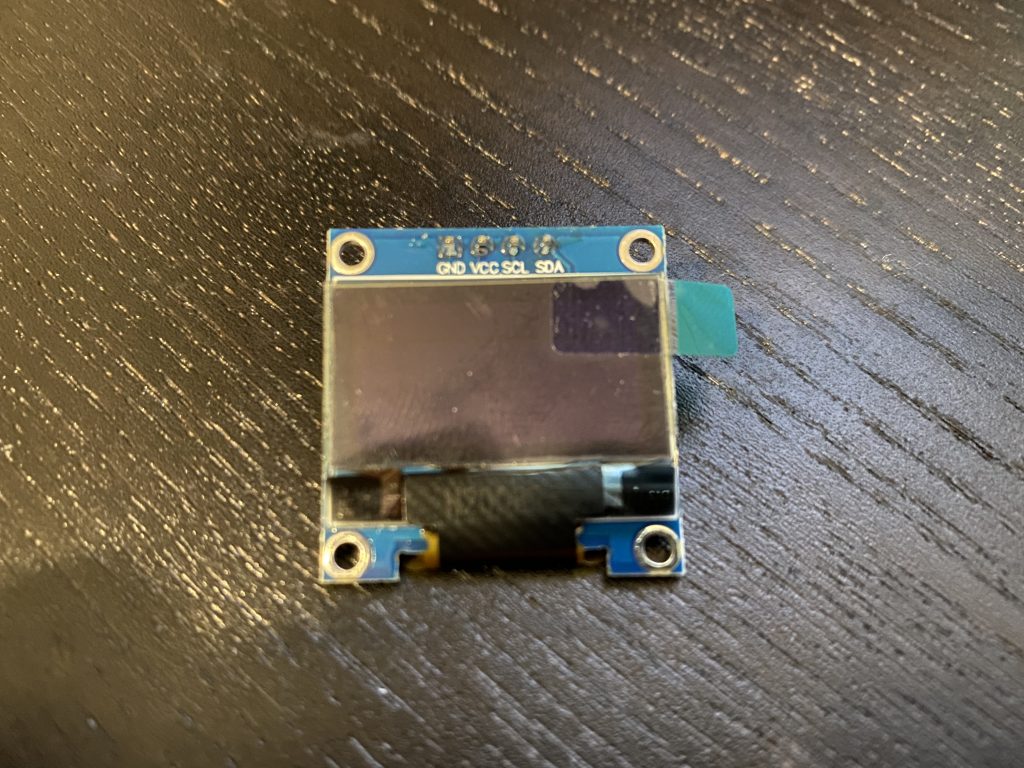
This particular one has the text in Yellow for the top 16 pixels and then blue for the bottom 48, but there are also many others available that are just normal black and white. As long as they use the SSD1306 chip and are I2C, they should likely work just the same.
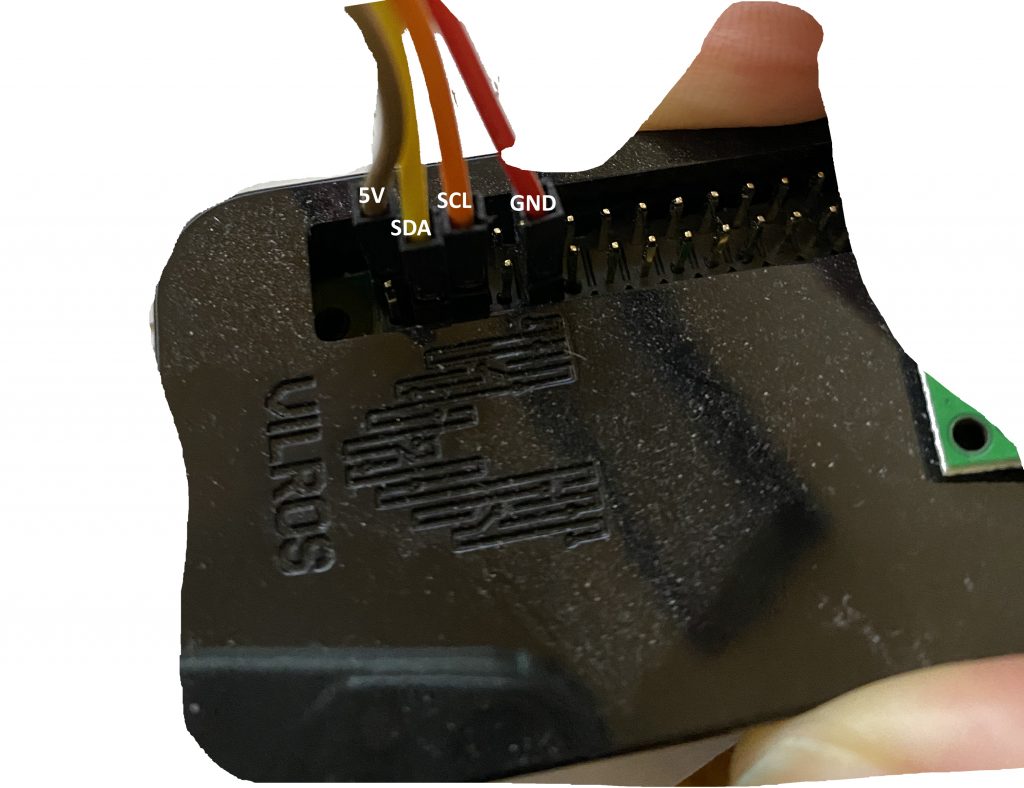
First thing is wiring them up, they use the SDA and SCL pins on the Raspberry Pi and a 5V and Ground pin. Below is a picture how I wired them up. You can refer to Raspberry Pi GPIO Pinout for a graphic of the pins.
With the wiring done, I’ve set up the software functionality for the Raspberry Pi to be able to communicate with the display.
The detailed steps for that are on the Github page for the METAR map.
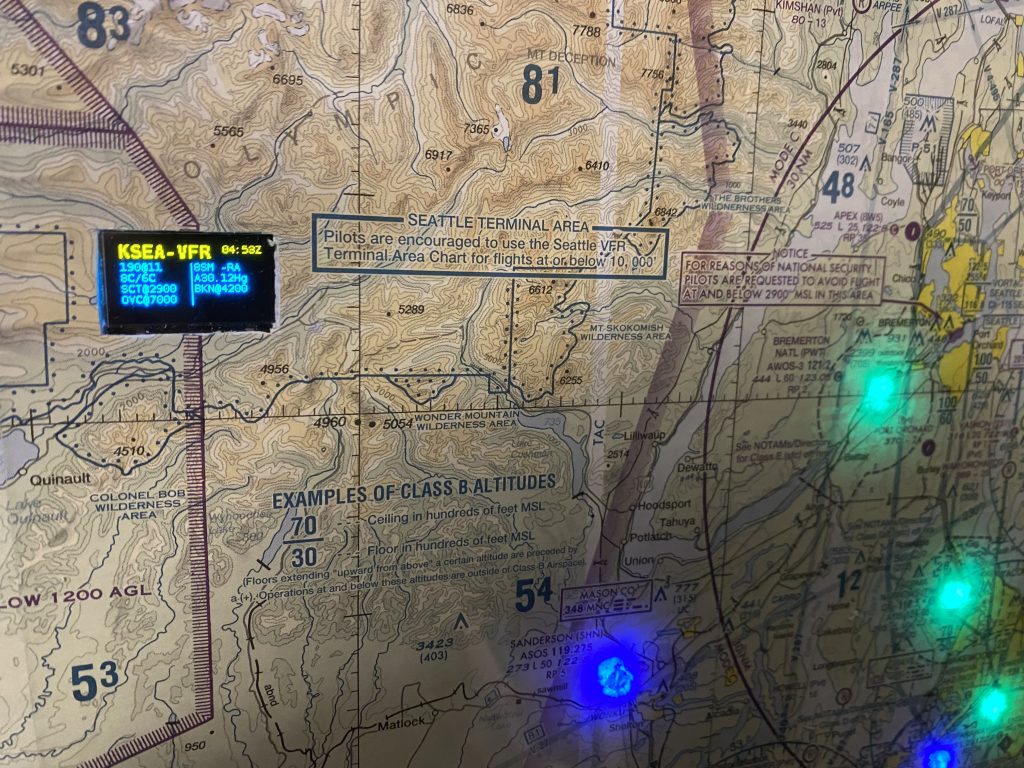
With the wiring and the software completed, I made a small cutout in my chart to embed the display, here’s the final picture:
Like the Project? I always appreciate a cup of coffee/tea!
Some of the above links to Amazon may earn me a small commission to keep the site running.
A great add. What would I do to keep the display static on one airfield ? I would like to mount it by my home field and only report on that field.
this is a great project I made one and then decided to make another with a friend. during his we ran into a couple problems during the led test they all light up for 2 second then they go out but the last 9 of the string of 50 stay lit. any ideas on why. I am ordering another light string to see if this one is faulty.
Great addition. I also designed a 3D printed holder for the display. Files to print your own are here: https://www.prusaprinters.org/prints/63999-metar-map-mini-display-holder
Hi Lynol,
For those of us without printers could we buy one from you?
Also the light pipes could we buy from you?
Happy to pay and shipping
If not, which prusaprinter do we need to print ourselves?
I have the Original Prusa i3 MK3S+
The files for printing are here: https://www.prusaprinters.org/prints/31428-aviation-weather-map-led-light-pipe
Hi,
Got the main map display working fine!
Installed all software for the mini display.
When I run the i2cdetect -y 1 it does run that script but doesn’t appear to detect anything.
I’ve enabled in Interface Options etc.
Do you think this is also a Power issue since I couldn’t seem to run the main map on the board alone (used external power supply)???
If so, can I run a lead from the light back to the mini-display or do I need to run from the mini-display to the external power itself and tie in with the map lead???
Can the external power supplies power the two devices ok?
Hi,
Got everything running it seems.
Two things:
1) I’ve noticed since I hooked up the mini-display that in the morning, the mini display is off and maybe some of the lights. If I connect into the pi unit and do ./refresh.sh it seems to “reset” everything and it might continue fine until say the next morning. Any ideas? I have the mini-display set to every 5 seconds as you indicated in the directions.
2) All works fine with the extra power adapter but it seems as though most people can run a 50 light strand on just the pi. Any idea what I might be missing? maybe how I’m wiring it up?
Hi,
Great project. The script seems to “time out” regularly. Not sure if it is related to the addition of the mini-display.
In the morning, the mini-display is off and sometimes some of the lights and when I go into the VNC Viewer I see that there’s a message that reads “done”. If I hit enter I get the raspberrypi prompt and I can execute the ./refersh.sh command and it starts up fresh.
https://ibb.co/TMcCCVM
Any ideas?
Hi,
Is there any console status display via the metarmap application using the Pi console HDMI port (or SSH)… or say maybe something that shows the execution and/or updates as it cycles? My goal is to hook a monitor to it below the mount location that could display console application output or better yet a status page that could be displayed (and automatically updated as it cycles). Thoughts? Thanks for your time and input.
I thought I would add a comment on what I did when creating mine. I downloaded the pdf of the sectional that I wanted to use. Actually it was two sectionals and I stitched them together in Photoshop and trimmed it down to the 16 x 20 proportionate area that I wanted to use. I saved the file out as a jpeg. I went up to the Richmond Camera website and uploaded the file to be printed on glossy paper and mounted to foam core at the lab. Once I got the print, I identified the locations for the METARS and one by one poked a push pin into the location on the front and marked the identifier on the back at the pin hole. Once I created all of the location points, I carefully used increasing size nails to enlarge the holes from the front of the print. then I used a Phillips head screwdriver and finally a Number 2 Pencil to make the holes the same size as the LEDs specified in the instructions. Then I went through the process of mapping out the course of my LEDs on the back of the print, numbering the order as I went, including any NULLs that had to be included between long runs. I ended up with 45 airports and 5 NULLs covering most of Virginia and parts of Maryland and West Virginia. I have a few pictures up at https://www.jwingo.com/metar/
Thank you again for this awesome project. I’m trying to add the display and can’t seem to install the last two required libraries.
sudo apt-get install libopenjp2-7 -y
sudo apt-get install libtiff5 -y
I get this:
Reading package lists… Done
Building dependency tree
Reading state information… Done
The following NEW packages will be installed:
libopenjp2-7
0 upgraded, 1 newly installed, 0 to remove and 0 not upgraded.
Need to get 138 kB of archives.
After this operation, 381 kB of additional disk space will be used.
Err:1 http://raspbian.raspberrypi.org/raspbian buster/main armhf libopenjp2-7 armhf 2.3.0-2+deb10u1
404 Not Found [IP: 93.93.128.193 80]
E: Failed to fetch http://raspbian.raspberrypi.org/raspbian/pool/main/o/openjpeg2/libopenjp2-7_2.3.0-2+deb10u1_armhf.deb 404 Not Found [IP: 93.93.128.193 80]
E: Unable to fetch some archives, maybe run apt-get update or try with –fix-missing?
I’ve looked online for answers and hate to bug you. Or perhaps someone else has fixed this problem. I’m just really not a coder. I’ve done:
apt-get update
–fix-missing
apt-get upgrade
Changed nameservers
Help?
Thanks for the help. I was able to solve. I had installed this metar a year ago so others may or may not have this issue with new install.
This is the command that worked.
sudo apt-get –allow-releaseinfo-change update
From this page
https://exerror.com/repository-http-deb-debian-org-debian-buster-updates-inrelease-changed-its-suite-value-from-stable-updates-to-oldstable-updates/
So I figured I’d do a full install to get the latest and now two new packages won’t install.
*`sudo apt-get install ttf-dejavu` (I assume just font dejavu)
Gives me `E: Unable to locate package ttf-dejavu`
*`sudo apt-get install liblcms1-dev -y`
Package liblcms1-dev is not available, but is referred to by another package.
This may mean that the package is missing, has been obsoleted, or
is only available from another source
None of my other fixes for apt-get worked. I hope to post a fix later.
Picked up some larger displays but they have a 1309 chip and a lot more connections. Anyone who has done this code, please post in github
Found a fix for the font issue when I had to re-build a corrupted SD card.
Use ‘sudo apt-get install fonts-dejavu’ instead and it should work without issue.
Good luck.
Hey,
About to start my METAR Map build, I’ve had the components sitting in a box the last 2 years because, frankly, I’m a wire guy, and know nothing about code..
My biggest question is, can I connect a photocell to the Raspberry Pi to dim the LEDs when the room is dark?
Wish me luck!
Thanks,
Dave
I’m new to this and trying to follow the instructions for the coding instructions on the following page and it says “copy new file displaymetar.py into the same folder as metar.py” — how do I manually get and copy the displaymetar.py file and put it into the metar.py folder while I’m on the raspberry pi?
If you are used to windows, then the easiest way is to connect to it using a file transfer tool like WinSCP where you can drag and drop the files over to the raspberry pi.
I am finally getting around to installing the package again after the failure due to the change in weather location. I downloaded all of the files from Github again. I am running into some roadblocks. The lights work when I manually test them. But nothing yet on the display and I get the following messages when manually running metar.py.
Are you able to help?
Thanks,
pi@METARPi:~/METARMap $ python3 metar.py
Can’t open /dev/mem: Permission denied
Traceback (most recent call last):
File “/home/pi/METARMap/metar.py”, line 257, in
pixels.show()
File “/usr/local/lib/python3.9/dist-packages/adafruit_pixelbuf.py”, line 204, in show
return self._transmit(self._post_brightness_buffer)
File “/usr/local/lib/python3.9/dist-packages/neopixel.py”, line 180, in _transmit
neopixel_write(self.pin, buffer)
File “/usr/local/lib/python3.9/dist-packages/neopixel_write.py”, line 42, in neopixel_write
return _neopixel.neopixel_write(gpio, buf)
File “/usr/local/lib/python3.9/dist-packages/adafruit_blinka/microcontroller/bcm283x/neopixel.py”, line 78, in neopixel_write
raise RuntimeError(
RuntimeError: NeoPixel support requires running with sudo, please try again!
swig/python detected a memory leak of type ‘ws2811_t *’, no destructor found.
Sarah
I installed the rpi_ws281x… icecream pytz again. I am down to the error below. I am using the airports file with new format and displayairports file. The led count has been set in know locations (50). Does this new format work. If so, what are the parameters for?
“KEZF”: {
“text”: 24,
“display”: true,
“visits”: 0
},
“KRMN”: {
“text”: 25,
“display”: false,
“visits”: 3
},
pi@METARPi:~/METARMap $ sudo python3 metar.py
Traceback (most recent call last):
File “/home/pi/METARMap/metar.py”, line 267, in
displaymetar.outputMetar1(disp, displayList[displayAirportCounter], conditionDict.get(displayList[displayAirportCounter][0], None))
AttributeError: module ‘displaymetar’ has no attribute ‘outputMetar1’
Thank you
Julius
Resolved. I somehow copied the old metar.py when I rebuilt the system.
Hello, I uploaded the most recent metar.py code, however, airports KC62, KMCX, and KPLD do not result in working LEDs. According to Aviationweather.gov, METAR data is presently available for these locations. Any suggestions? Thanks very much.
Airport METAR data for KC62, KMCX, and KPLD made available by making a change to line 153 of metar.py file. Specifically “contraint” changed to “postfilter”.
Thanks.
I have made three METAR maps using our METAR map Python code and they have been working great until several days ago.
I found a reference that the FAA changed the way to access the airport weather database, but I don’t know enough about the details of the new URL to know how to apply it to your Python code.
Have you or will you provide an update to the required URL in your METAR map Python code due to the change the FAA made in the last several days?
Thanks Much,
Wallis